Users who have read the previous articles should know that for ERC-20 protocol tokens, we can trade through DEX represented by Uniswap to achieve decentralization. So for the ERC-721 protocol, that is, NFT, how to achieve decentralized trading.
Some of the current mainstream NFT exchanges use the order placement method to conduct transactions, just like listing items on supermarket shelves. If the buyer thinks the price is right, he or she can take the item home.
This article will implement decentralized trading of NFTs by writing smart contracts and a simple front-end page. Please note that this article is for learning purposes only and cannot be used in a real production environment.
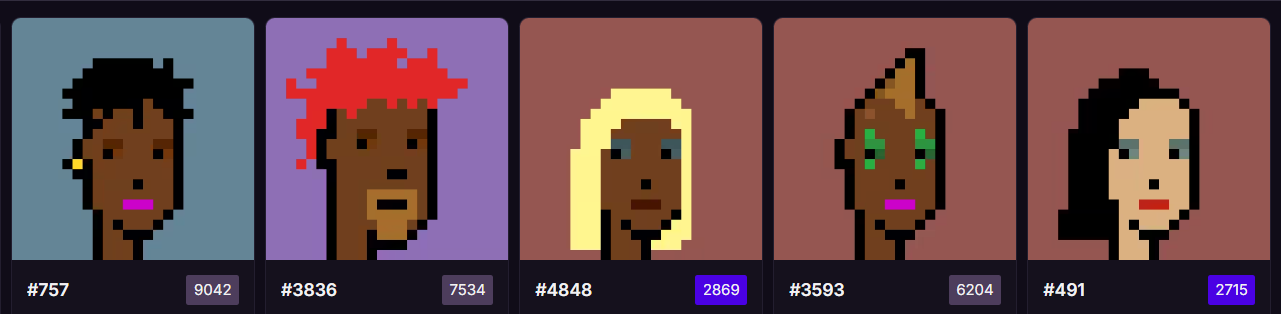
NFT (Non-Fungible Token)
NFT is a non-fungible token, that is, each token is non-fungible and different, and it follows the ERC-721 protocol. Generally speaking, each NFT will display a different picture in the wallet, and each group of NFTs will have a unique ID to distinguish them.
Due to the characteristics of NFT, it is impossible to set the price through the price curve like ERC-20 - because each token is different. Therefore, the more common trading method at present is through the order book.
Order Book Trading
In simple terms, the order book model means that the price of the product is set manually, which is different from the way Uniswap calculates the price through the price curve. The order book is generally divided into two trading modes. One is the pricing order, that is, the seller sets a selling price in his mind. If there is a buyer who thinks the price is right, the buyer can buy it . The other is the purchase order, that is, the buyer issues a purchase order according to his own needs, and when the seller thinks the price is right, the seller can sell it .
Generally speaking, the price of a purchase order is lower than the price of a quotation order. This article only introduces the first pricing method.
Functionality of NFT DEX
The basic functions of an NFT DEX should include the following:
- Listing products: List an NFT at a set price
- Purchase goods: Purchase according to the NFT pricing
- DEX fee: A fee is charged in proportion to the transaction price.
Listing products
To list a product, you need to do the following:
- Front-end: Users select their own NFT, set a price, and click to list it.
- Contract: Users need to set permissions for the contract to manipulate the user's NFT.
In this way, the product is listed. In the contract, a user's product price map needs to be maintained. This part of the data can generally be done in a centralized service to reduce the burden of the contract, but in this article, this part of the Map data will be maintained in the contract.
Purchase Products
When you buy something, a few things happen:
- Front-end: The user selects an NFT they want to buy and clicks Buy.
- Contract: Call the contract to transfer the user's money to the seller of the NFT and transfer the NFT to the buyer.
Implementing an NFT DEX
In this section, we will implement an NFT DEX from scratch. This is the DEX address nft-dex-frontend.vercel.app that the author has deployed.
1. Create an NFT
For testing purposes, it is best to have our own NFT. We can quickly build an ERC-721 NFT through Remix, which provides a corresponding template.
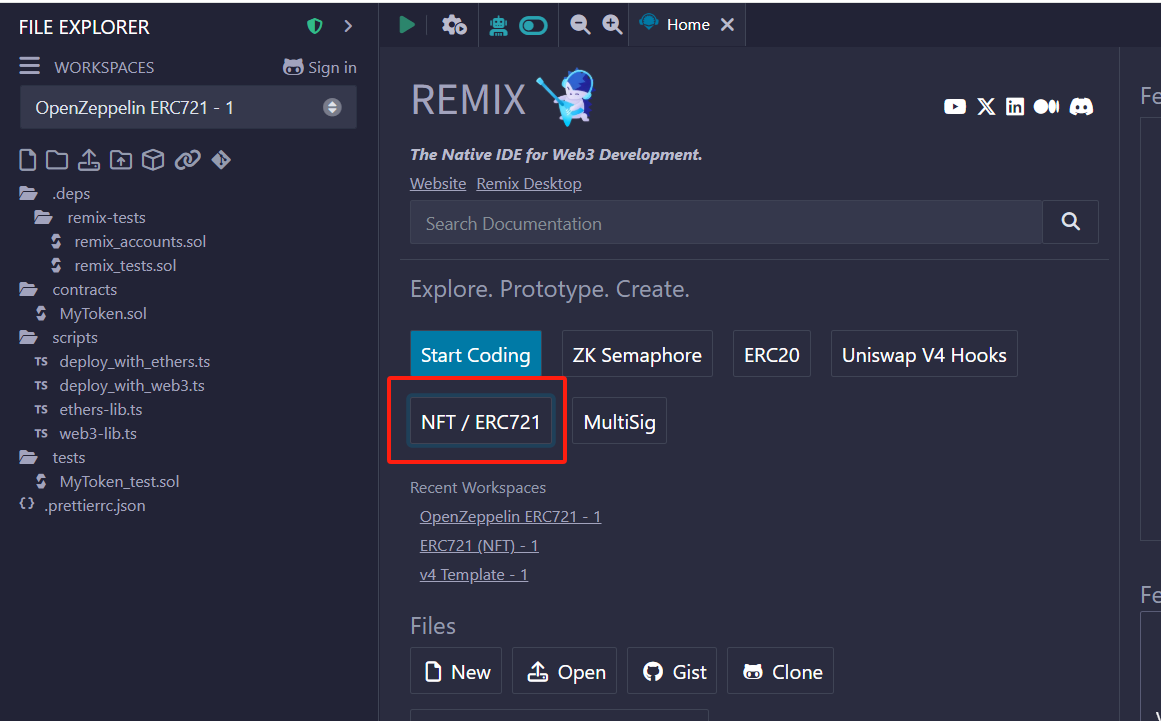
We can easily deploy an NFT according to the template. Of course, you can skip this step and directly use the NFT we prepared.
2. Contract Writing
Our contract method should include the following methods:
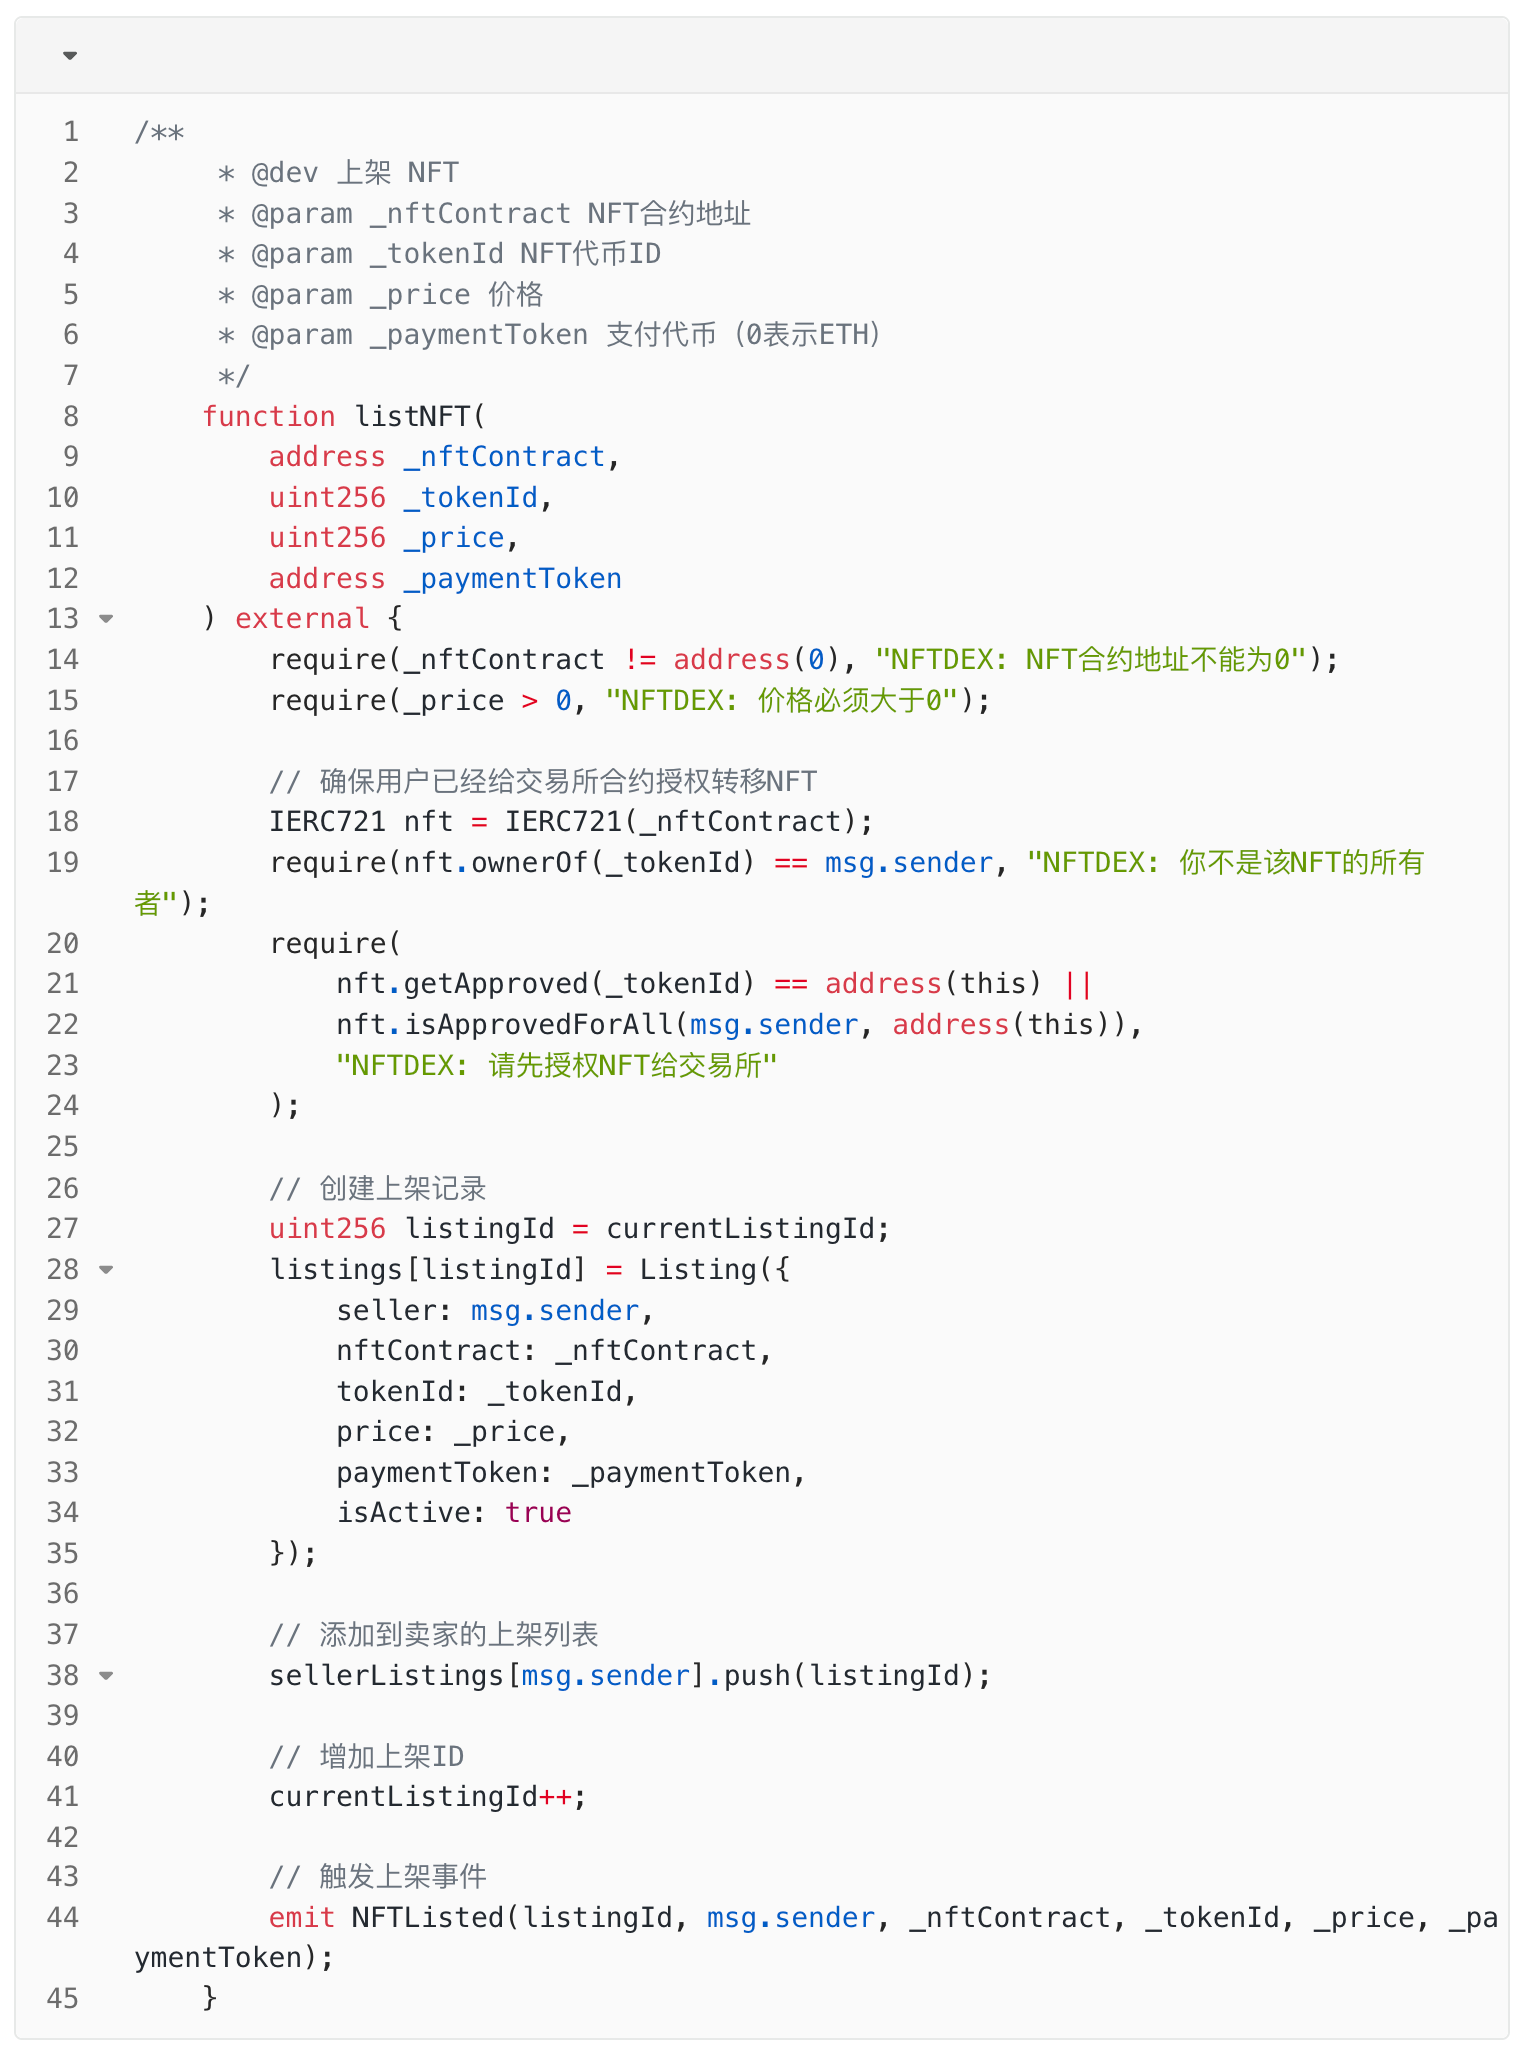
2.1. Sellers List NFTs
Sellers need to specify the NFT to be sold and the corresponding price. When listing, users need to sign the NFT authorization method to allow our smart contract to have the authority to operate this NFT, so that when a buyer purchases it, the transaction can be automatically completed.
So the process should be like this: 1. The user chooses his own NFT; 2. Set the price, which can be the stable currency USDT, USDC, or ETH; 3. Authorize the NFT to the contract.
After that, you can call the contract listing method, which needs to do the following things:
- Verify ownership of NFT
- Add listing record
- Events that trigger listing
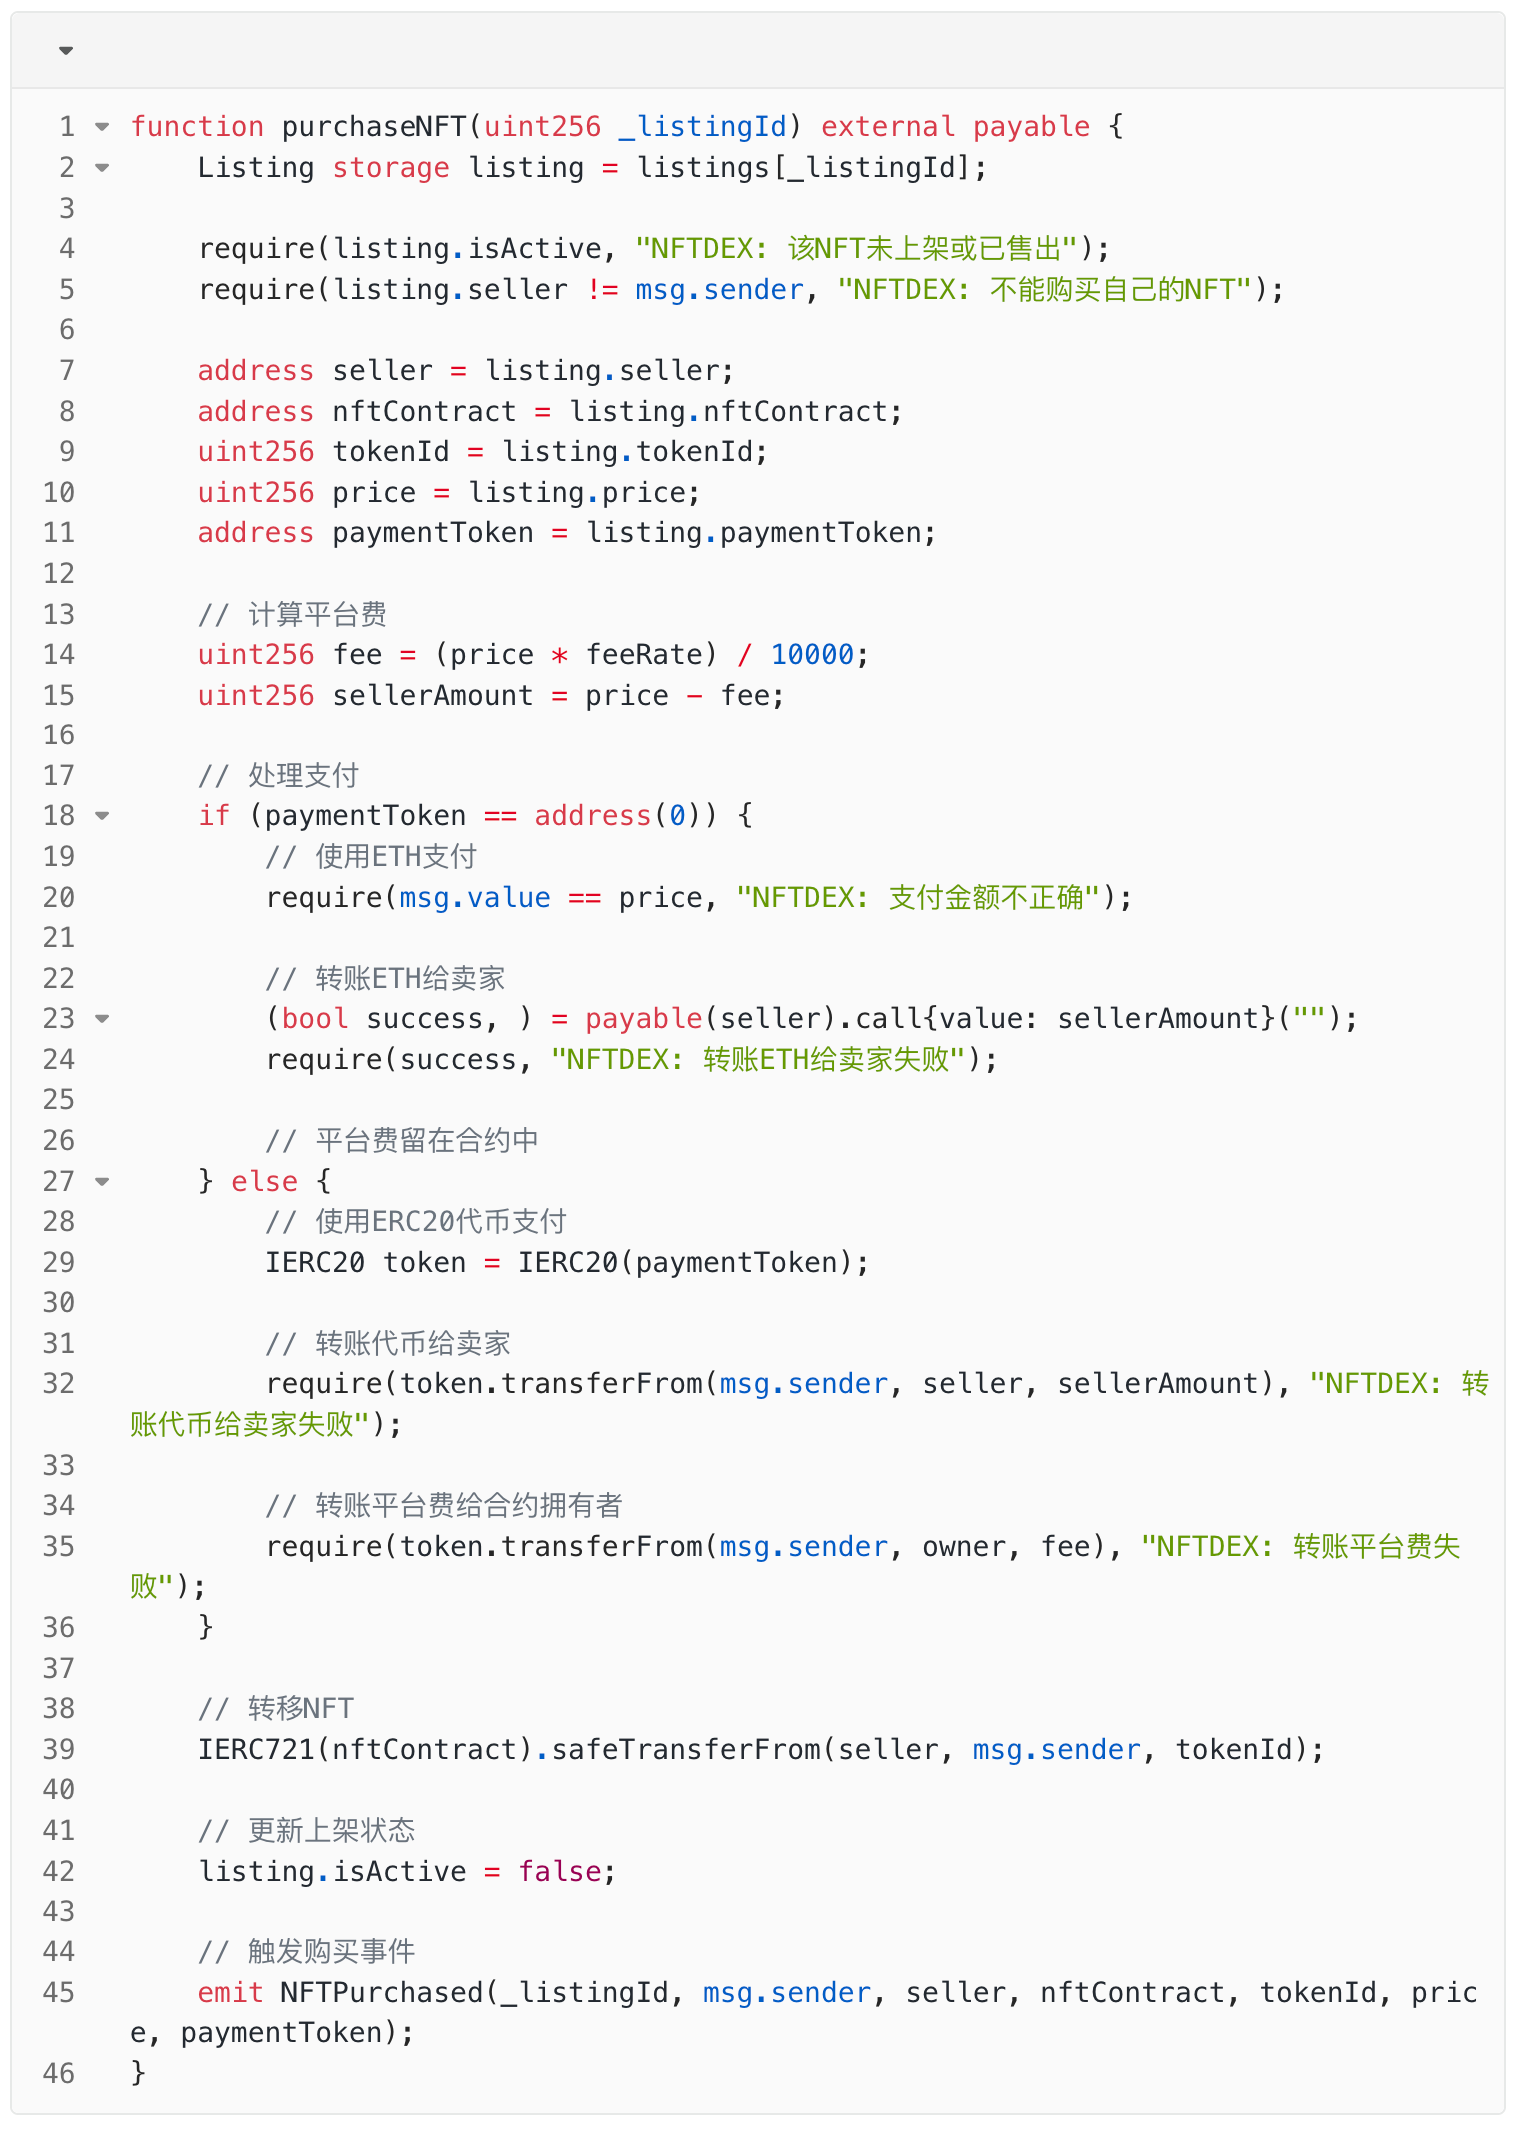
2.2. Buyer purchases NFT
When a buyer purchases an NFT, the user only needs to select the NFT they want and pay the corresponding token. The following steps will be performed at the contract level: 1. Read the corresponding NFT data from "listings"; 2. Calculate the handling fee based on the price of the NFT and deduct it from the transaction price; 3. Transfer the NFT to the buyer; 4. Trigger the purchase event
2.3. Cancellation of listing
Of course, the seller may feel that the price is not suitable and choose to cancel the listing. You can see that we have reserved an isActive field in the place where the listing information is saved to indicate whether the product is valid. Therefore, when canceling the listing, we only need to set this field to false.

2.4. Withdrawal Fee
DEX can charge a fee for each transaction. This fee can be deposited into the contract or transferred to another address of your own. This article adopts the method of depositing it into the contract.
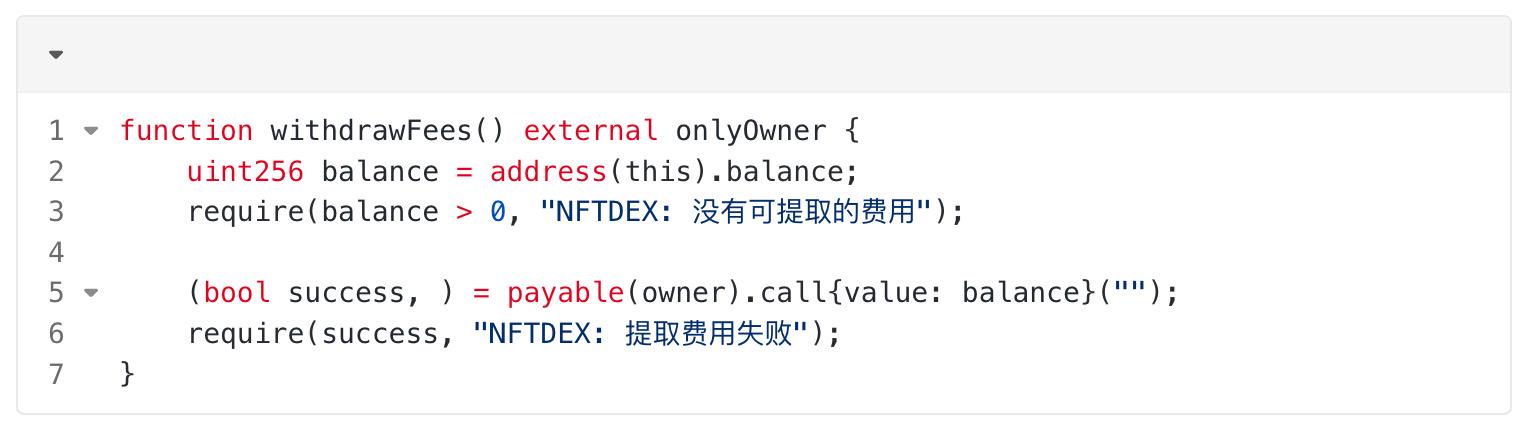
So far, the basic functions of our contract are complete.
3. DEX front-end development
Before we start, we need to prepare some tools, including the following:
- Ant Design Web3: used for wallet connection and NFT card display.
- Wagmi: Used to interact with the wallet.
- Nextjs + Vercel: Deploy our project.
Our front-end application should contain three pages: Mint, Buy and Portfolio. Mint is for users to mint our NFTs and is only for demonstration. Buy is our DEX mall where users can purchase our NFTs. In Portfolio, users can list and delist NFTs.
3.1. Connecting to a wallet
Connect the user's wallet and use Ant Design Web3 to implement
The process of connecting the user's wallet is very simple, just use the connection component provided by Ant Design Web3 .
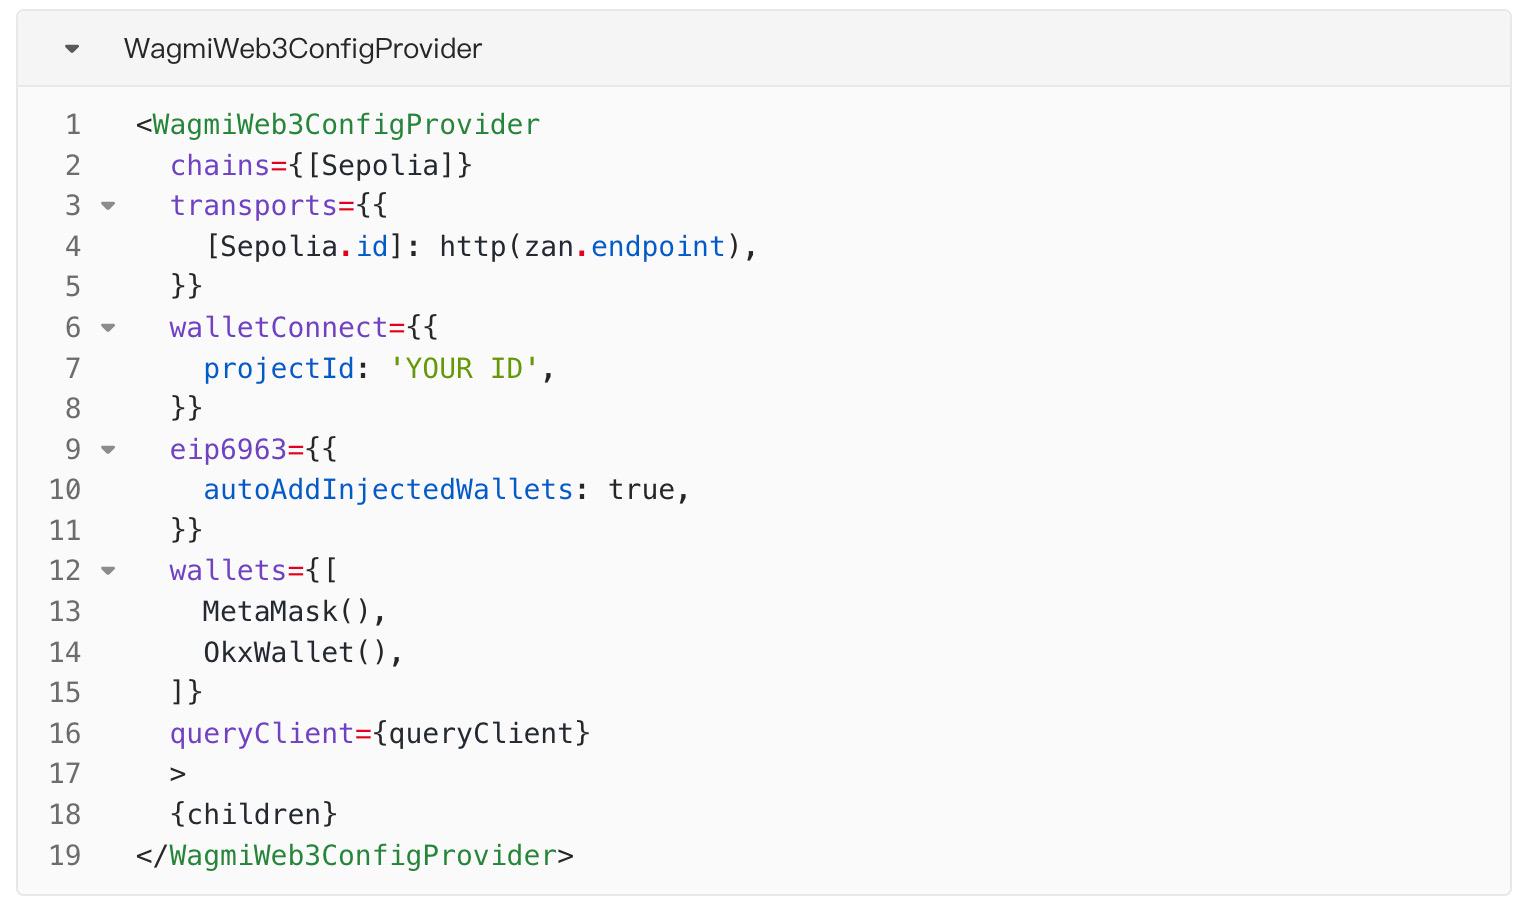
First, we wrap a Provider in the outer layer of the project, so that we can use the capabilities of Ant Design Web3 in subsequent codes. In addition, since we need to connect to the sepolia test chain, for speed considerations, it is recommended to use some node services to increase the speed of data query. I use the ZAN endpoint here, which is very suitable for use in the Asia-Pacific environment. It is fast and very cost-effective, and supports a wide range of chains.
Then place a connection button where you need to connect to the wallet:

That’s it, it’s very simple.
3.2. Mint
Mint an NFT and get test tokens at https://zan.top/faucet/ethereum
On the Mint page, we can mint the NFT for testing. Mint is an operation to write a contract, and here we need to use the useWriteContract method in wagmi. We just need to specify the contract address, contract ABI, and contract parameters.
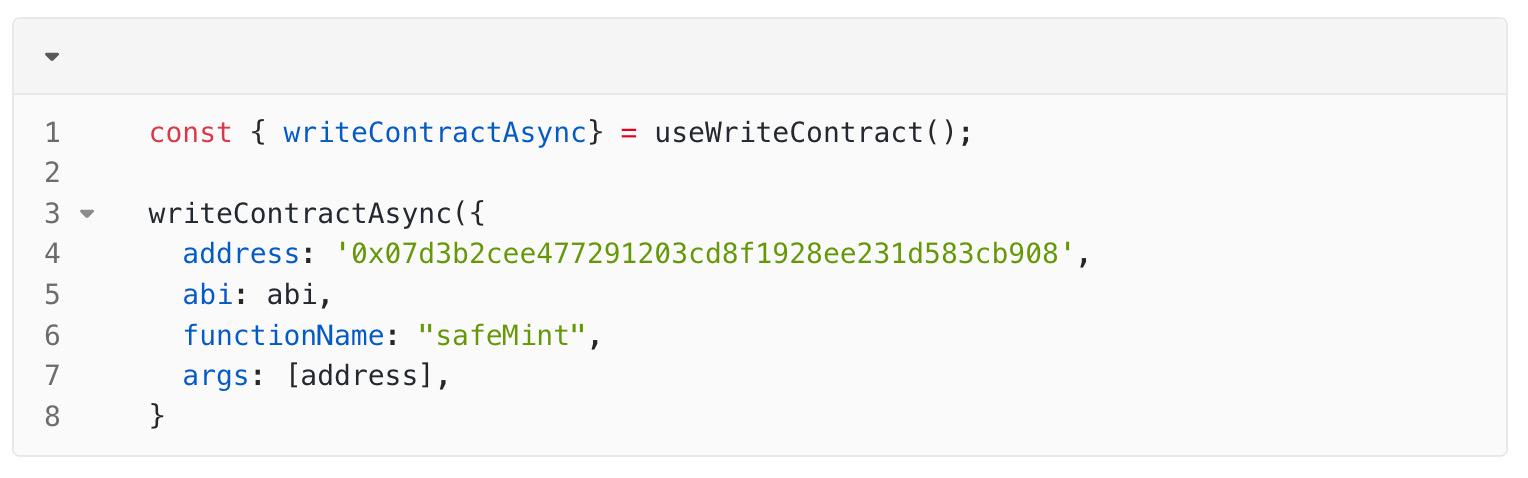
After that, confirm in the wallet and the mint will be successful.
3.3. Portfolio
Managing users’ NFTs
Here we need to display all the user's NFTs. We can use some NFT APIs to obtain them. Here we use the opensea API because there are not many NFT APIs that support the sepolia test chain.
After obtaining the user's NFT list, it is necessary to determine whether it has been listed. If it has not been listed, it can be listed, and if it has been listed, it can be removed. The way to determine is to obtain the user's listed NFTs through the "getSellerListings" method in the DEX contract, and then determine whether it is being listed based on the "isAlive" field of these NFTs.
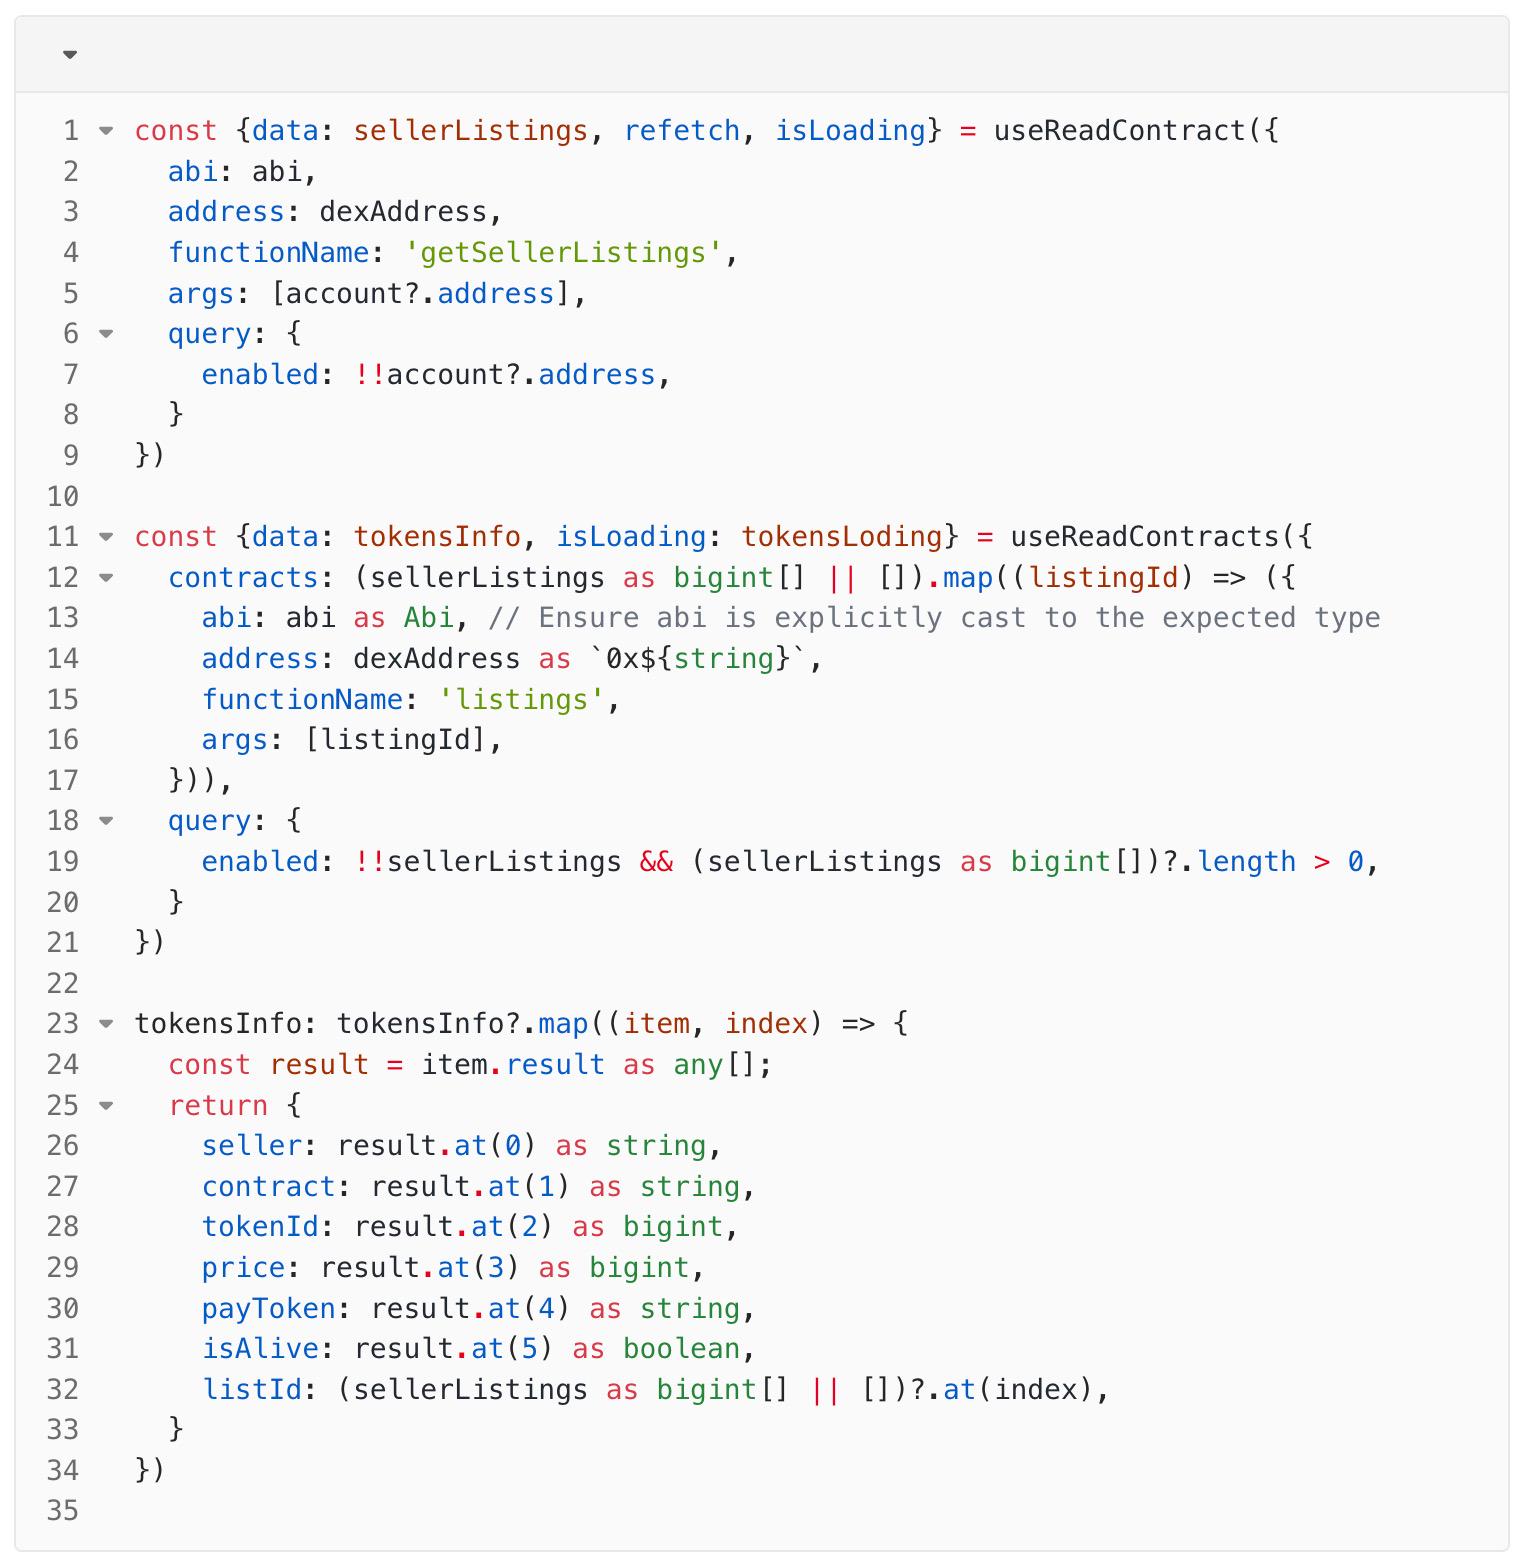
When listing, you need to call the "listNFT" contract method, and when canceling, you need to call the "cancelListing" method. Before listing, you need to call the NFT authorization method to authorize the NFT to the contract, so that after the subsequent transaction is completed, the NFT can be automatically transferred to the buyer.

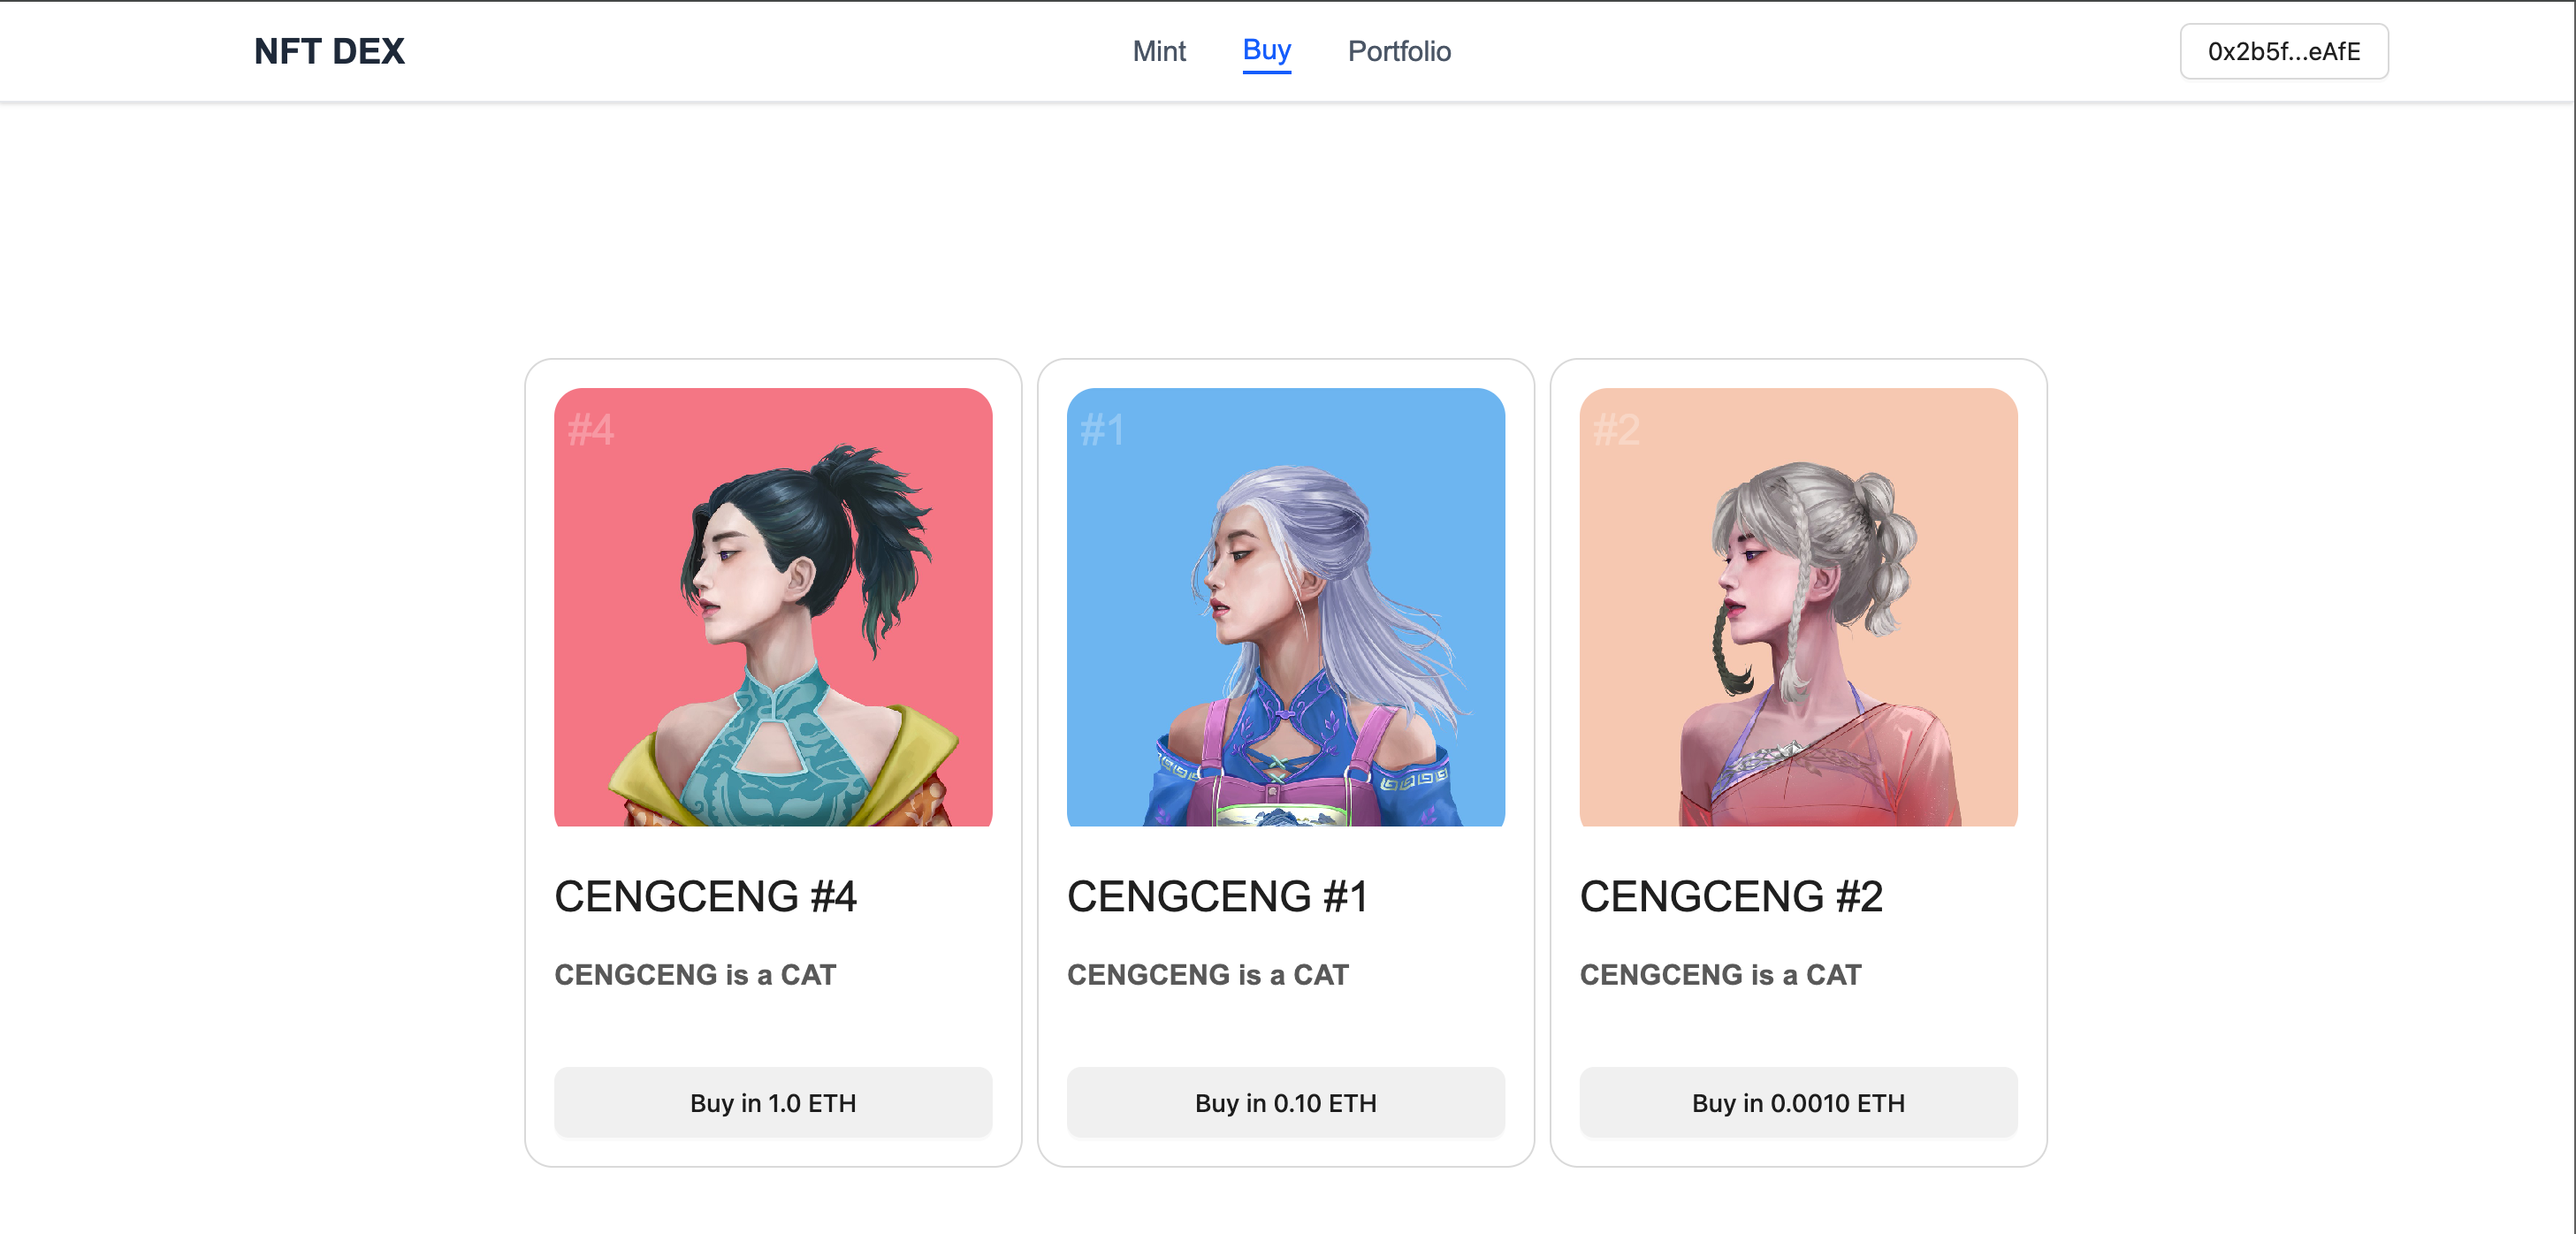
3.4. Buy
You can buy NFT in Buy
First, we need to display the NFTs that have been listed. This is similar to displaying the NFTs that users already have in Portfolio, but the difference here is that one is global and no longer for a certain user, and the other only needs to display the NFTs that are Alive.
When purchasing, use the "purchaseNFT" method. When calling this method, you need to use ETH to pay the selling price.
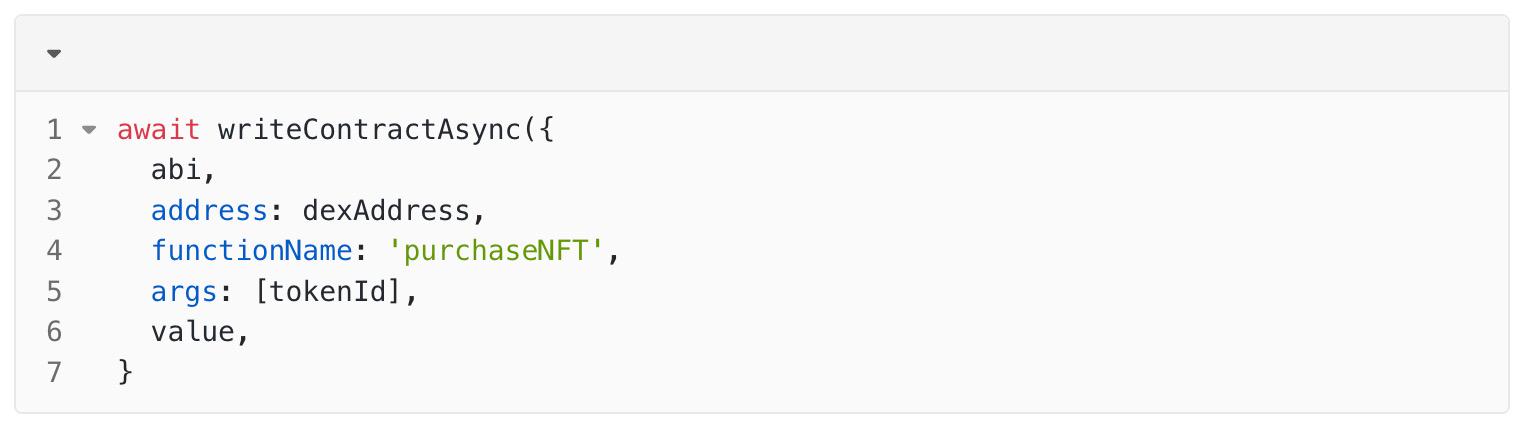
The "value" here is the ETH that the buyer needs to pay.
A DEX front-end page with all basic capabilities is now complete, and we can deploy it in vercel.